If you don't know how to add pages to your blog, don't sweat.... It is SUPER EASY!
Go to your Posting tab and click on Edit Pages and Click on New Page
Now Add a Title and some info (it works just like a post), and click Publish Page.
Finally, pick a Navigation Bar, click Save and Publish, and Done!
Showing posts with label Easy. Show all posts
Showing posts with label Easy. Show all posts
1.03.2011
12.15.2010
EASY DIY Custom Blog Design Part 4: Header
This is a Series of Tutorials, so if you need to start at the beginning, CLICK HERE.
Step #1: Making the HeaderI found this really cool website called Picnik it is so easy to use, and the best part is that it is FREE and NO registration required!! I will show you how I made this header, so that you can make one that is 100% Custom for you!
First, head over to Picnik, and click on Get Started!
EASY DIY Custom Blog Design Part 3: Wide 2 Column Template
This is a Series of Tutorials, so if you need to start at the beginning, CLICK HERE.
In this part of the tutorial, I am going to show you how to make a wide 2 column template with nice white space. If you want to make a 3 column template instead, I have a tutorial HERE.
This tutorial uses the Minima Template (if you started at the beginning, I already had you do this).
First, you will need to head over to your Edit HTML page and scroll down to #header-wrapper { and change 660px to 1000px (or change it to what ever width you would like, in my example I am doing 1000px).
Next do the same thing on your #outer-wrapper {
Now I need to adjust the #main-wrapper { I changed my width to 640px.
Then adjust the #sidebar-wrapper { I changed mine to 300px.
If you like your sidebar on the right, you can stop here, but if you would like to change it to the left, I will show you how to do that now.
Go to your #main-wrapper { and change $startSide to $endside, and go to your #sidebar-wrapper { and change $endSide to $startSide. Now it should look like this!
Now Save your Template, and you are set!
EASY DIY Custom Blog Design Part 1: Getting Started
One of the biggest complaints/questions that I get about these tutorials, is that some people don't have Photoshop or they don't want to download any software and try to learn all of it to do a custom blog design. So... I have been doing some serious searching and experimenting, and I am going to show you how to make a cute and completely CUSTOM Blog Design with NO software that you have to download!!

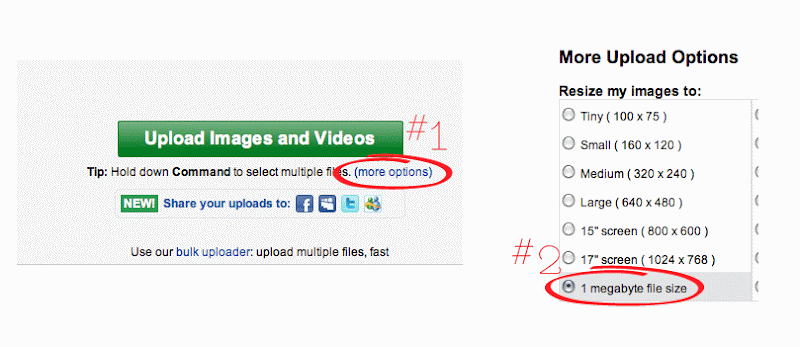
So the first thing that we need to do to get started is to set up a photobucket account. Go to Photobucket.com and set up the FREE account. Once that is set up, you need to make sure to click on "(more options)" see below, and select "1 megabyte file size"

Back in blogger, the very FIRST thing you need to do is to back up your template, to do that, go to "Edit HTML" and click on "Download Full Template". Take that file and make sure you know where it is so that if you need to go back you can.
We need to change our template to Minima, it is an older template, so you will need to go to your "Edit HTML" page, and click on "Select Layout Template", then you will see it :) When you click on "Save Template", it may or may not ask you if you wish to keep your widgets, if it does, keep them, unless you want to loose everything on your sidebars.
That is all we need to do to get you started!
12.13.2010
DIY Custom Blog Design Part 7: Post Divider
This is Part 6 of a series of tutorials, if you need to start at the beginning, click here.
In this portion of the tutorials, I will show you how to make and add a post divider to your blog. First you need to determine what size you need to make your post divider. To do that, go to your Edit HTML page and scroll down to your #main-wrapper and you will see your width there.
My width was 540px, so I went ahead and made my post divider 540x75px. I made the post divider the same way that I did my header in the header tutorial.
To install your post divider, you need to upload it to photobucket and grab your direct link code. Then head over to your Edit HTML page and find this section: .post {
First, add these lines:
background: url(Your Direct Link Code Here);
background-repeat: no-repeat;
background-position: bottom left;
Second, delete this line:
border-bottom:1px dotted $bordercolor;
Third, change your padding-bottom to suit your post divider, I changed mine to 4em, but if you have a taller post divider, go with a larger number. You may just have to play with it a bit.
Your final code should look something similar to this:
Thats it!!
12.02.2010
The Easy Way to Make a Seamless Pattern in Adobe Illustrator and Install it in Blogger.
I used to make all of my blog backgrounds about 1600px X 1000px, which is all good.... but I hated it when I would look at my designs on my dad's 30in monitor and I would see all that nasty white space on the sides of my beautiful designs.
Hopefully with this simple tutorial, I can get you hooked on seamless patterns as backgrounds. Not only are they simple to make, and oh so lovely, the go on forever and ever, no nasty white space. Oh, and don't let me forget, they are smaller in file size, therefore, they will show up quicker when you are loading your page.
So on to the tutorial! This is going to be the first of 2 tutorials, and this one is the UBER EASY way to do it. We are going to take a dingbat font (this is "Davys" that I found at fontsquirrel.com) and make that into our seamless pattern.
11.05.2010
DIY Custom Blog Design Part 2: Background
This is Part 2 of a series of tutorials, if you need to start at the beginning, click here.

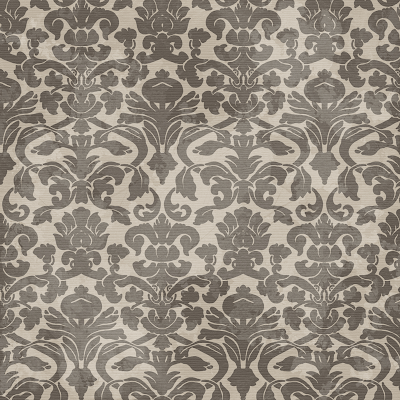
I have picked this paper from Amanda's Kit to use for my background:

So what I need to do first is open my paper up and size it down to 72dpi and somewhere between 1200 and 1800px (I totally just grabbed that number, just remember that this is custom, so size it where you want it :)
Subscribe to:
Posts (Atom)


