


I am so excited to do this tutorial, it is something that I have thought about for a long time. I wanted to put together a completely custom blog design and show everyone that is ambitious enough how to do it themselves.
So there are TONS of ways to approach a custom blog design, so I just decided to pick one direction and go with it. I am going to take a digital scrapbooking kit and make a custom blog design from that.
Here is a quick list of places that I found to get free digital scrapbooking kits (NOTE: Make sure to check the owner's Terms of Use, many are NOT for Commercial Use, only Personal):
http://makincuteblogs.blogspot.com/2010/09/freebie-sweet-n-summer-mini-digital.html *This one is MY design :)
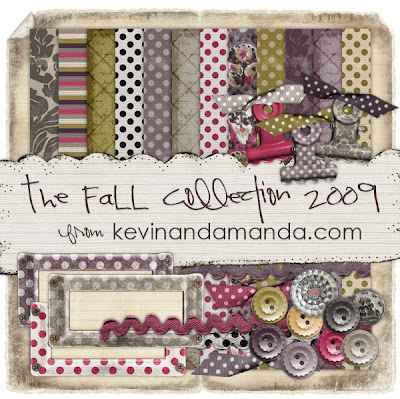
I chose to go with one of my favorite bloggers' kits, "The Fall Collection" at kevinandamanda.com! Check her out, because she has FREE fonts as well, and they are super cute!
So the first thing that we need to do to get started is to set up a photobucket account. Go to Photobucket.com and set up the FREE account. Once that is set up, you need to make sure to click on "(more options)" see below, and select "1 megabyte file size"

Back in blogger, the very FIRST thing you need to do is to back up your template, to do that, go to "Edit HTML" and click on "Download Full Template". Take that file and make sure you know where it is so that if you need to go back you can.
We need to change our template to Minima, it is an older template, so you will need to go to your "Edit HTML" page, and click on "Select Layout Template", then you will see it :) When you click on "Save Template", it may or may not ask you if you wish to keep your widgets, if it does, keep them, unless you want to loose everything on your sidebars.
Move on to Custom Blog Design Part 2: Background


No comments:
Post a Comment