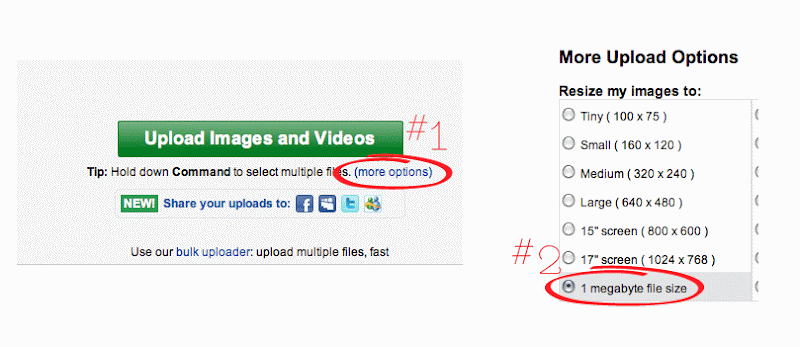
So the first thing that we need to do to get started is to set up a photobucket account. Go to Photobucket.com and set up the FREE account. Once that is set up, you need to make sure to click on "(more options)" see below, and select "1 megabyte file size"

Back in blogger, the very FIRST thing you need to do is to back up your template, to do that, go to "Edit HTML" and click on "Download Full Template". Take that file and make sure you know where it is so that if you need to go back you can.
We need to change our template to Minima, it is an older template, so you will need to go to your "Edit HTML" page, and click on "Select Layout Template", then you will see it :) When you click on "Save Template", it may or may not ask you if you wish to keep your widgets, if it does, keep them, unless you want to loose everything on your sidebars.
That is all we need to do to get you started!


Apparently Photobucket has changed its layout recently or I'm completely inept (probly that one) can't find the more options at the very beginning!
ReplyDeletesame, I think that the layout has been changed
ReplyDelete